Trips
Topics covered:
- What's a Trip?
- Viewing a Trip
- Creating & Updating a Trip
- Trip Links & How to Find Them
- Embedding a Trip
- Downloads
Trips are the most popular way to share your travels with family and friends. Trips show where you are and where you've been. Here are some important facts about trips:
- Trips can be public or private. Public trips can be easily found by anyone on SpotWalla. In order to view a private trip, the user must have the trip link. Private trips will not be displayed in any search results on SpotWalla.
- Trips can be password-protected.
- You can choose the message types shown on a map. For instance, if you use OK or Hotel/Lodging messages to mark your overnight stops, you can share a trip publicly and configure it to not show these message types.
- You can add one or more devices to a trip. All devices must be in your account.
- Each device can be shown in separate tracks or combined into a single track.
- Trips can one or more tracks overlays on the map.
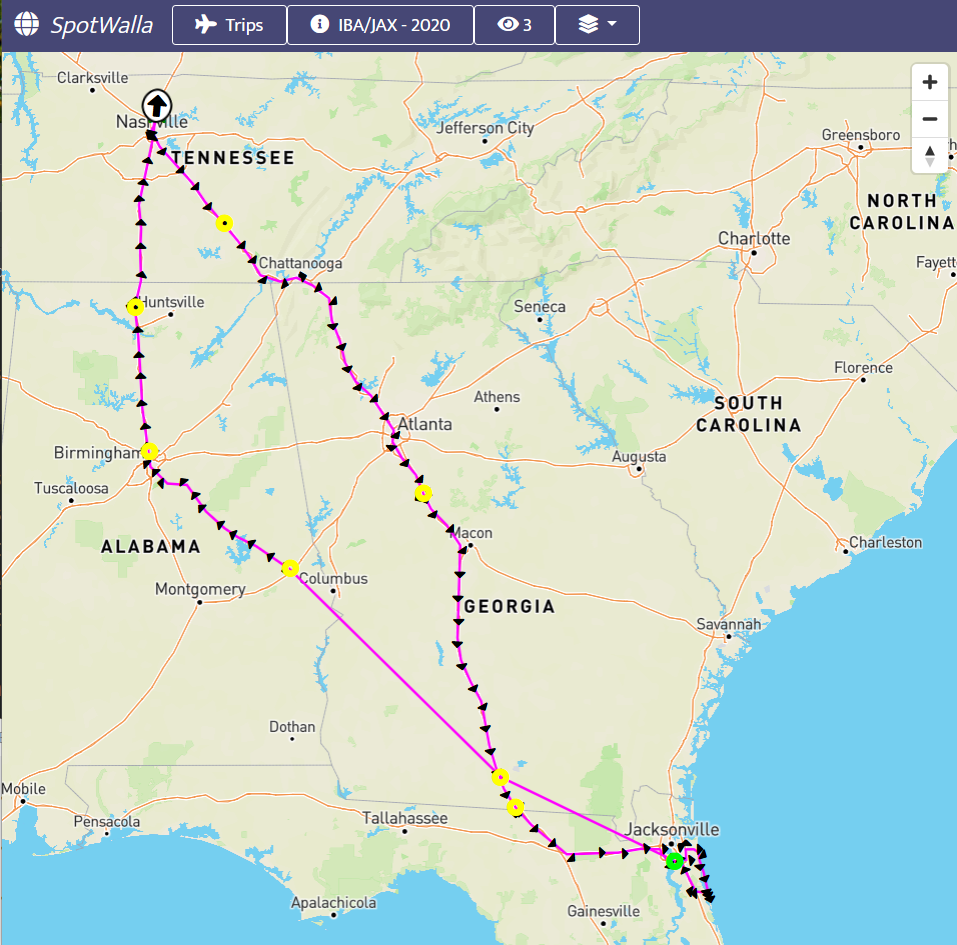
And here's a sample trip...
Finding Trips
If someone shared a trip link with you, click it to view the trip. If you're just someone who wants to browse public trips on SpotWalla, you can click the Public Trips link on the home page and browse to your heart's content:
When you find a trip that interests you, click the trip name to view it.
The Trip Viewer
The trip viewer is, well, what displays a trip. At the top of the map is an area that displays information about the trip and allows you to interact with it.

From left to right...
- SpotWalla - Click it and you'll go back to the home page.
- Trips - If you're logged into SpotWalla and viewing a trip, clicking this button will take you back to the Trip Manager.
-
2024 All Devices - The trip name is displayed so
you know what trip you're looking at. Clicking the button will display trip detail and the legend.
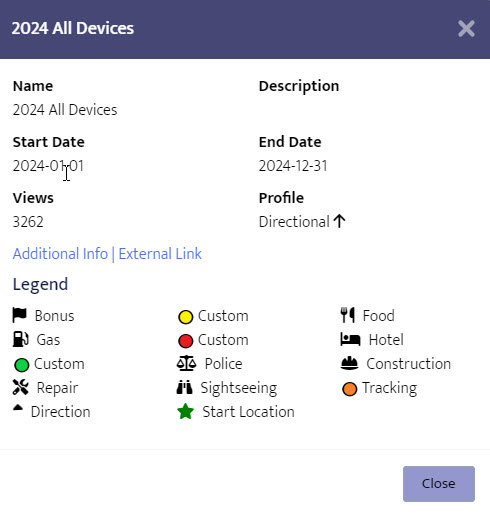
- 3,261 - The number of views/hits the trip has accumulated. Clicking it does nothing.
- - Click it and you can change the map type display.
-
- Click it to view all the pictures in this trip.
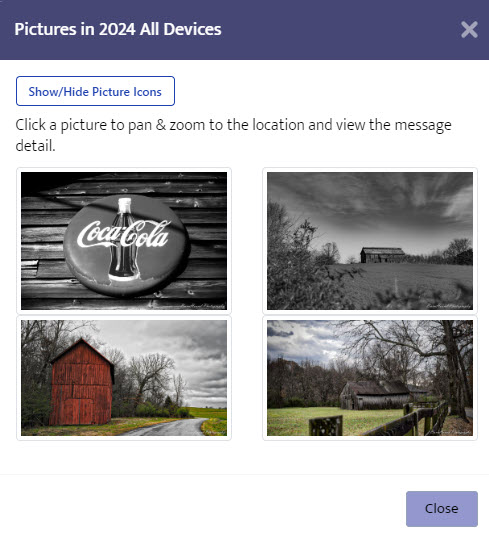
Click the Show/Hide Picture Icons button to toggle the display of the picture icons in the trip viewer. Click any picture to pan/zoom the map to that location and open the message detail popup.
-
- The adjustments button allows you to change the
amount of history displayed and the density of locations on the map. You can also see the
affects of filtering in SpotWalla by examining the message types and number of messages
available and on the map.

- - Only displayed if the trip is active. Clicking will pan/zoom the map on the last known location.
- 04:56 - Only displayed if the trip is active. It displays a countdown timer until the trip is refreshed automatically. Clicking the button will refresh the trip immediately.
Looking at the sample trip below:
Other than the header we just went over, you'll notice the zoom control toward the top-right of the map. You will also notice tracking locations are marked with small triangle that's points in the direction of travel. When viewing a lot of history, It's a good want to determine the direction traveled at the time.
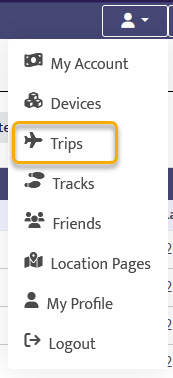
Creating or updating trips start in the Trip Manager. If you're logged in, you can get to the Trip Manager from Your Dashboard or from the user menu at the top of the page.
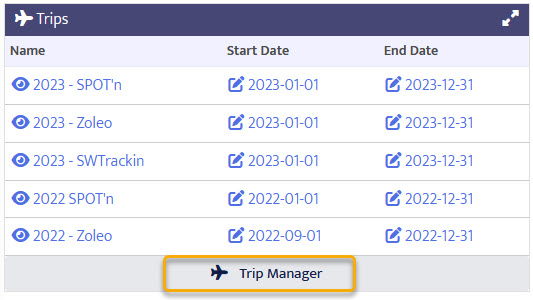
The Trip Manager groups trips by their end date. Within each group, they're ordered by name.
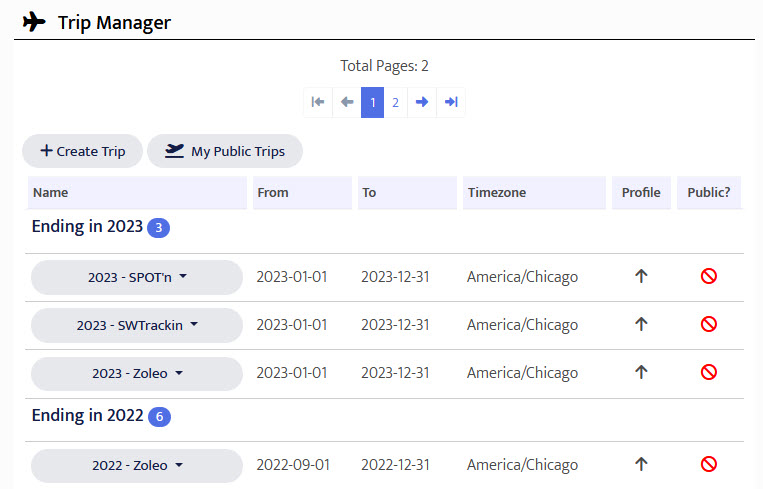
If you want to create a new trip, click the Create Trip button toward the top of the Trip Manager. If you want to share all your public trips with family and friends, click the My Public Trips button. A window will appear with your public trips link. Share with others however you see fit.
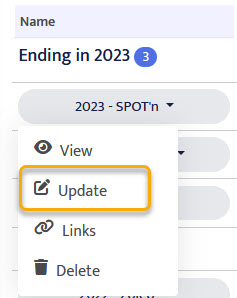
To update a trip, click its name and select Update from the menu.
Trips have a lot of settings. There are four groups of settings:
- Basics - Essential and required information.
- - Security-realted settings.
- - Additional settings that are not required.
- - Track overlays displayed on the trip map.
Each group of settings can be viewed by click the group tab at the top of Create Trip screen as shown below.
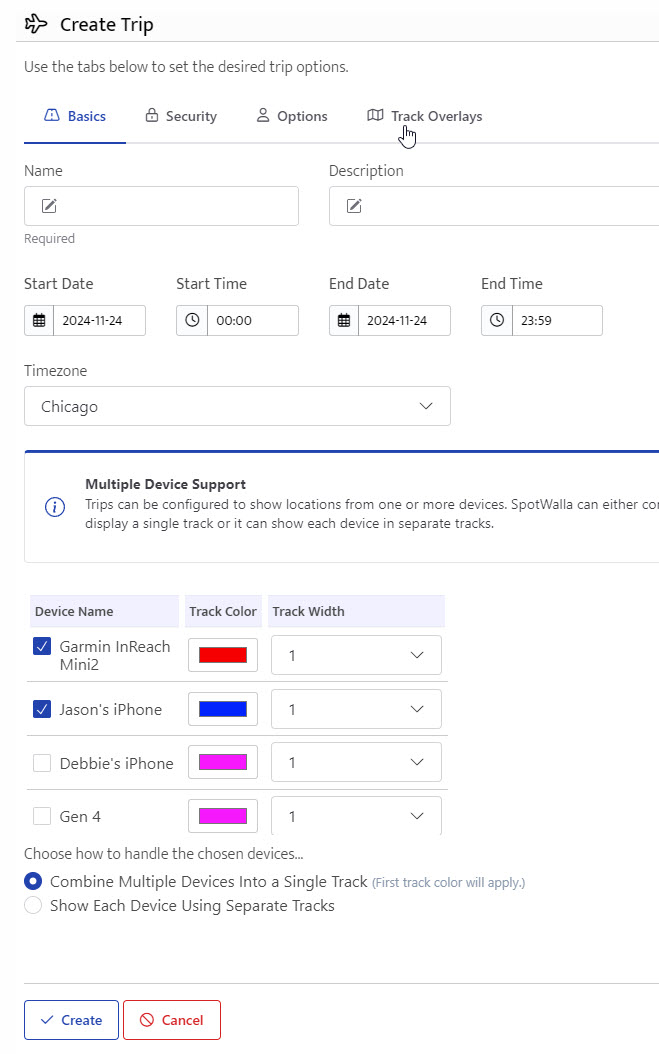
Basics Tab
The Basics tab options shown above include the trip name, description and start/end dates. You will also choose one or more devices to display on the map, the color of the default track for the device, the track width and how to display each device on the map.
If multiple devices are added, you can combine the devices into a single track or show each device in a separate track. When combined into a single track, the track color of the first device selected will be used.
Security Tab
On the Security tab you can choose to apply active secure zones or not. If you're creating a private trip that will only be shared with family and close friends, you may not want to honor secure zones so everything is displayed. On the hand, if you're creating a public trip, applying active secure zones is a good way to protect sensitive locations like your home or place of work.
Some other security options determine if the time component and speed data will be displayed in the message detail popup.
The difference between a public and private trip is that public trips can be searched for and viewed by anyone. A private trip will never show up in search results in SpotWalla.
Enabling the download option for a trip will allow anyone viewing the trip to download all trip locations in various formats. Only enable this option when necessary.
You can also add a view password to the trip. This is an added layer of security you can use to protect your location.
Lastly, you can prevent certain types of messages from being displayed on the trip. For instance, if you use OK/Lodging messages to mark your overnight stops and you're creating a public trip, you may want to hide OK/Lodging messages.
Options Tab
On the Options tab you can change the trip profile (e.g. Motorcyclist, Directional, Sailor, Runner, etc). You can also set the initial map type (e.g. Street, Terrain, Satellite and Hybrid) and control how the map will be rendered initially.
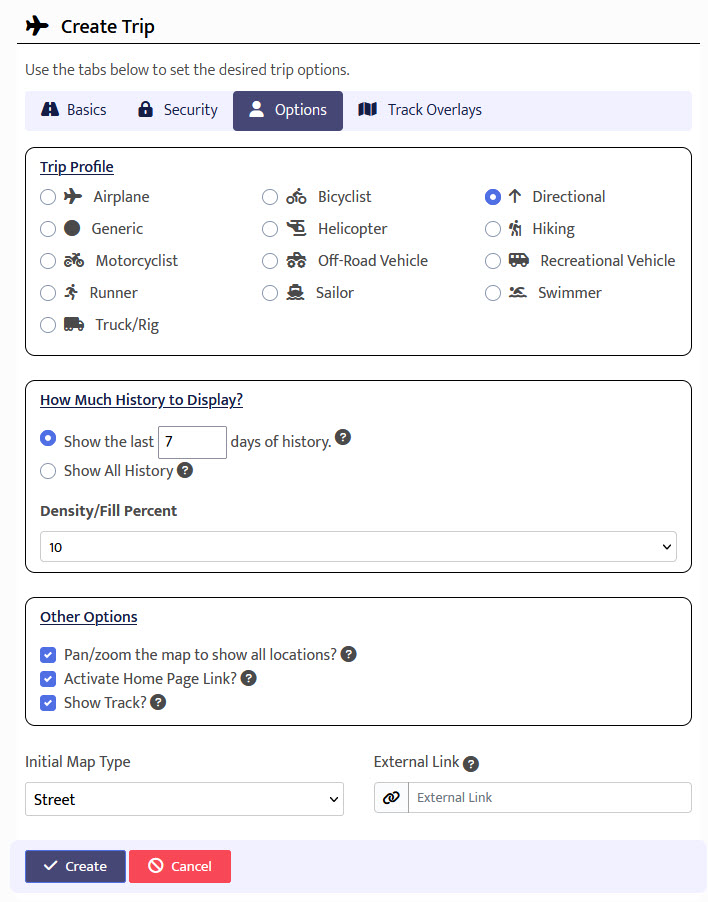
By default SpotWalla will only show the last 7 days of history while your trip is active. You can override the number of days or you can choose to display all history. And using the Density/Fill Percent setting, you can control the number of locations (the density) returned. This can have a huge affect on how the trip looks to the viewer.
The other trip options allow you to pan/zoom to show all locations returned or pan/zoom the map on the last known location. If you're embedding the trip in a web page, you may want to disble the home page link to prevent viewers from being able to browse SpotWalla within your website. The Show Track option will show the underlying track or not.
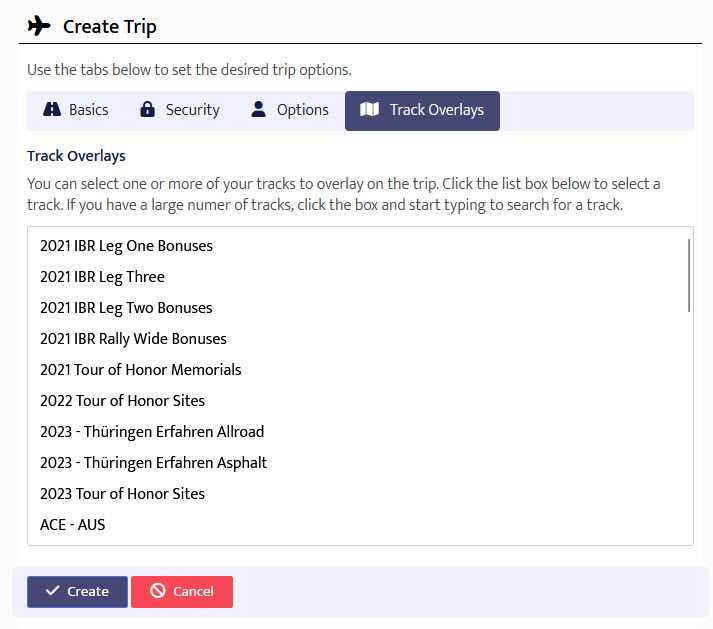
Track Overlays Tab
If you have tracks defined in your account, you can overlay one or more on your trip.
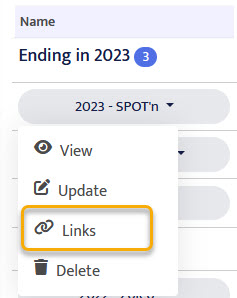
Finding and building a trip link occurs in the Trip Manager. Once there, find your trip and click its name. Then choose Links from the menu.
The Trip Links dialog will appear:
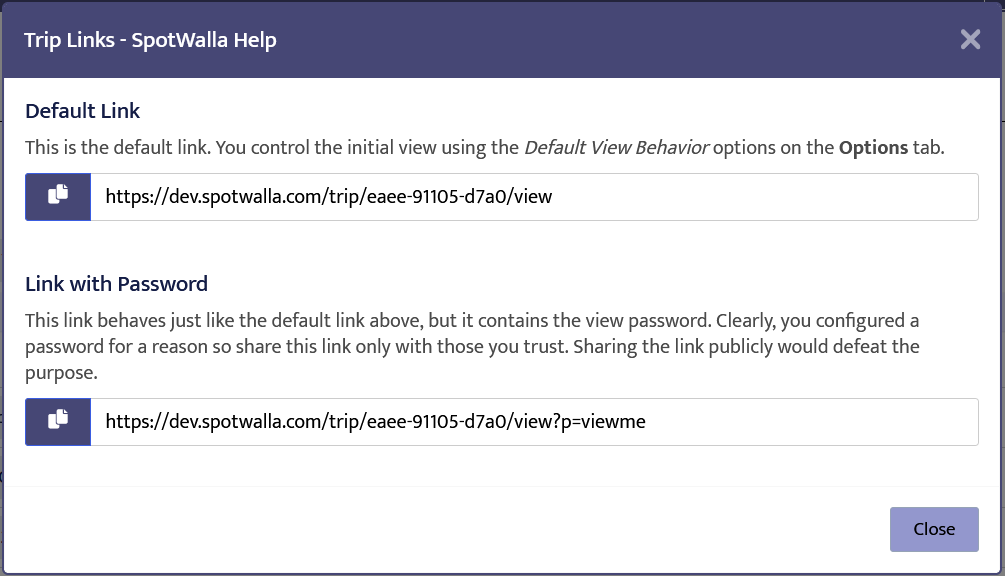
The default link will show up to the last 7 days of history and will pan/zoom to show all locations. The SpotWalla home page link will be active. To copy this link, click the next to the link. Now you can paste it in an email, post it anywhere on the web.
If your trip is password-protected, you will see another link that includes the password. This is a convenience link that can be shared with others. They won't be prompted for the view password. You'll want to be careful when sharing this link. Only send it to people you trust and let them know it shouldn't be shared with others.
If you have your own website, you can embed a trip using the HTML IFRAME element. You need to understand HTML in order to do this. We will simply provide the basics, but you can make the map as big or small as you choose.
The first thing to consider is the trip link you will embed. If you haven't already, read over the section above: How Do I Find Trip Links?. When you know the link, save it somewhere for future reference.
The basic IFRAME element looks like this:
<iframe
    src="embed link goes here"
    width="100%"
    height="100%">
    If your browser/web server does not allow embedding, you will see this message.
</iframe>
You can control the size of the iframe using the width and height attributes, but you may want to wrap the IFRAME element in a DIV element to better control size, orientation, etc.
The next step is to set the src attribute to the trip link you generated in the previous step.
Downloads, when enabled for a trip, allow anyone viewing the trip to download all location data associated with the trip. The locations included are no different than what would appear on the trip it. So if your trip is configured to honor secure zones, they'll be honored in the download.
Enabling Downloads
Trip downloads are enabled/disabled on the Security table when updating a trip.
To download a trip you must first view the trip. In the trip viewer, click on the trip name toward the top of the page to display the information dialog:
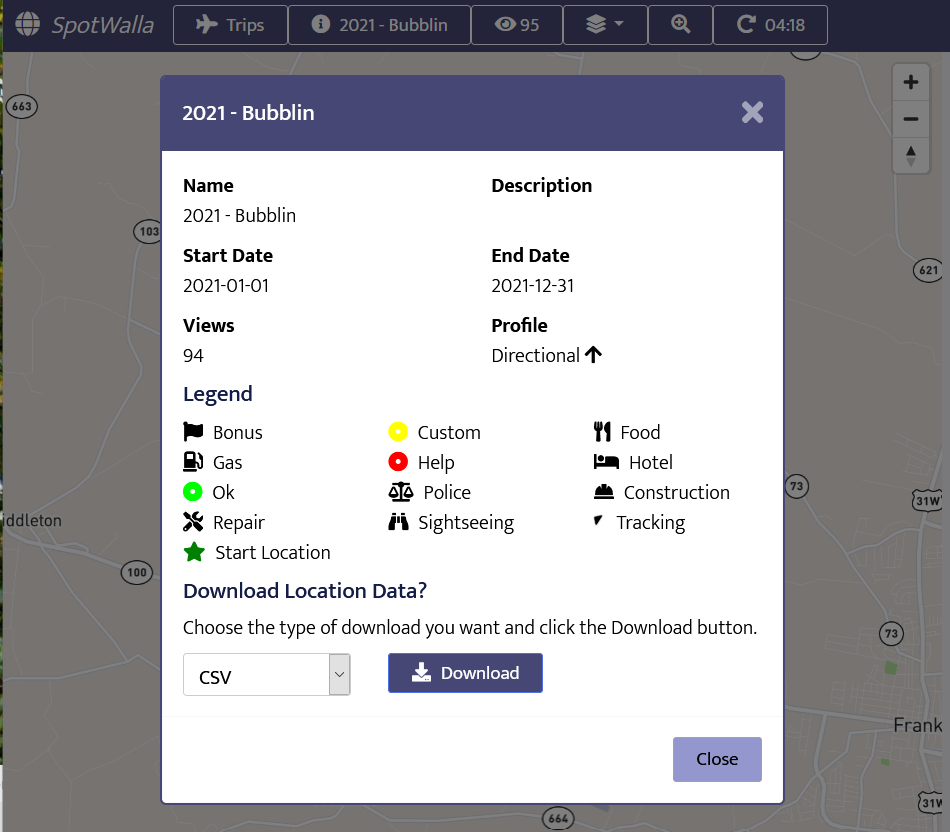
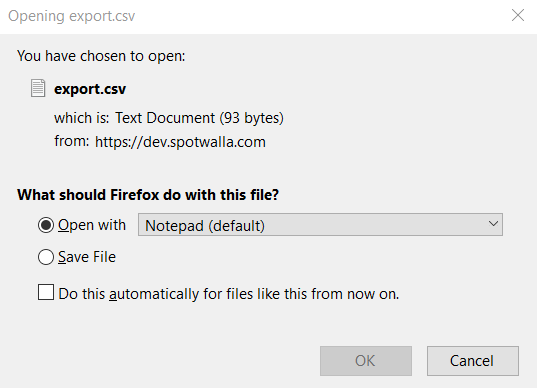
Choose the download type (CSV, KML or GPX) and click the Download button. Depending on your operating system, how it's configured and what options you've set, you will likely get an option to open or save the download file.
When you're finished downloading, click the Close button to dismiss the dialog.